Rheas
We say Reeee--AH. Others say Ray---AH! Toe-may-toes
- Toe-mah-toes, lets call the whole thing off!
Techniques for Successful Rearing of Rhea Chicks
Genetics
Starting out with parents that are proven producers of defect-free, healthy
chicks is the first step in successfully raising rhea chicks to maturity.
Newly Hatched Chicks
Early Environment Newly hatched chicks are normally left in the incubator
for 24 to 36 hours depending on the whether the chick is acting normal or not.
The chick should be banded or microchipped at that time. Look the chick over
carefully to see if it has any physical problems. Swab the navel area with iodine
upon hatching and 24 hours later. Some chicks may have a protruding navel and/or
a small amount of unabsorbed yolk sack. Chicks that are allowed to struggle
out of the egg normally usually do not have this problem. This situation must
be rectified immediately by a method that will not introduce bacteria into the
navel area. I suggest using a sterile surgical glove. Gently push the protruding
navel and any unabsorbed yolk sack into the chick's abdomen and swab the area
with iodine. Check this area several times a day, without letting the temperature
drop too low in the hatcher.
Chicks that hatch completely on their own or are only partially assisted and
allowed to kick their way out of the shell are often more vigorous and absorb
their yolk sack normally. Chicks that hatch on time normally have less leg problems
than those that hatch early.
Looking for leg problems Early diagnosis of leg problems is imperative
if you are going to correct the problem with an individual chick. Be sure that
the bottom of the hatcher tray is not slick and will allow the chick to stand
up on its own. You can use terry or paper towels. Be sure that the air is allowed
to circulate sufficiently, however, through the bottom of the tray. If a chick
is not able to stand because of a slick surface, he will become spraddle legged.
The legs can be taped, hobbling the chick but leaving enough room so the chick
can walk but cannot spraddle the legs out. This condition must be corrected
immediately or it will be permanent and worsen rapidly. A chick that cannot
walk, cannot eat and it is all down hill from there!
In the brooder Sanitation is of utmost importance in keeping chicks healthy.
Disinfecting the brooder regularly will help in keeping disease down.
Brooders can be built easily with 1" chicken wire with 2" x 4" wood frames to
your own specifications. We raise ours 24" off the floor. The bottom of the
brooder is 1/4 inch wire mesh. We put ratite carpet on the floor of the brooders
so it is easier on the chicks legs and feet.
The brooders and carpets are brushed and washed with disinfectant and water
every day to remove feces and feed. The concrete floor can be washed easily
and hosed down the drain.
The temperature in the brooder should be around 90 degrees. A heating pad can
be used - we use a farrowing heating pad for pigs and place ratite carpet over
it. Our brooder boxes are kept at 90-94 degrees for the first few days, with
the temperature gradually reduced as the chicks get older.
New chicks may not drink or eat for a day or two as they continue to absorb
the yolk sack. Dishes and waterers should be designed to that chicks cannot
stumble into them, get wet and either drown or get sick. You may wish to put
a large stone in any dish you think the chick might be able to climb into.
Food may be sprinkled on a white towel to stimulate eating. A slightly older
chick that is already eating is a good teacher. We use ratite starter with a
smattering of chopped greens and chopped hard-boiled egg at the rate of about
1 egg per ten chicks.
A few pieces of chopped lettuce or spinach on the top of the water will stimulate
the chick to pick at the leaves and then drink the water. Water dishes should
be washed daily and disinfected every three days.
Some breeders add poultry electrolytes, water soluble vitamins and terramycin
to the water at the rate of about 1/3 tsp. each per gallon of water.
The Older Chick
Nutrition When chicks are put out into their run, they can be fed ratite
grower, all they can eat in a one-hour period, two times per day. This will
prevent overeating and obesity. Overweight will cause additional leg problems.
Alfalfa pellets can be left free-choice for this age bird. (a well-known breeder
uses a 50/50 ratio of 16% rabbit pellets and 19% ratite pellets, free choice
except at night when food is removed. At first you can use ratite starter, and
add pellets to the mash. As soon as they are eating pellets well, eliminate
the starter ration from the diet. Check the feed dishes daily to be sure that
there is no old, moldy food in them.
Grit
Rheas, along with ostrich MUST have grit available to prevent impaction and
to promote proper grinding of the food prior to digestion. I cannot stress this
section enough. Oyster shell is a good source of calcium but will break down
very fast and not be as good a source of grit as crushed granite.
Water
Of course, it goes unsaid that fresh water should be provided at all times at
a level that the chicks can easily find. If the chicks are on dirt, be sure
that the bowl is moved daily so that a mud hole does not develop. This mud hole
will be the breeding place for bacteria by the millions. Electrolytes and water
soluble vitamins may be added as desired.
Environment Group by age
Chicks are placed in these areas at about 2 weeks of age and should be grouped
by age to allow equal competition for food and pecking order. Older birds may
pick on younger birds' eyes and other parts of their body. Because of the Rhea's
long laying season, you may have several distinct groups of young.
Climate
The month old chick can be put outside daily when the weather is nice. Be sure
that someone will be available to herd them inside in case of bad or rainy weather.
Chicks may not have the sense to find the door, even if it is left open. A cold,
wet chick can become a sick chick in fast order. If there is a step-up to get
in side the building, be sure that you place a long ramp, covered with carpet
for traction. You can also paint the ramp and sprinkle grit on the paint while
it is still wet.
Flooring
Flooring in the brooder room and runs should all provide good traction and be
easy to clean. They should have no debris that the birds can pick up and swallow.
There are several surfaces that are being used today.
Sand floors, although nice to look at in the beginning are hard to keep sanitized
and many rheas will eat large quantities of the sand and can cause impaction.
It retains urine and has to be changed often. This surface also can contribute
to rolled toes.
Bare rough finished concrete can be adequately disinfected, but is cold and
hard and can contribute to toe and leg problems.
Epoxied surfaces are easy to clean but can be slippery when wet.
Epoxy painted floors with sand sprinkled on surfaces have reduced disinfecting
qualities but traction is much better.
Rubber matting is easy to clean but slippery.
Pea gravel is not good because it can and will cause impaction.
Wood chips and chopped alfalfa can be broadcast on concrete surfaces. They will
eat both and the wood chips will cause impaction. The alfalfa when wet will
become moldy and cause respiratory problems.
Sani-Tredr is a liquid rubber base that can be applied to the floors and bonds
with them becoming waterproof and has good traction.
Fencing
Older chicks can usually be maintained with fence made with 1" x 2" mesh. On
runs for small chicks, smaller mesh will save a lot of 'head' aches both for
yourselves and for the birds. You can build panels of this wire and use some
sand on the floor. The feces must be removed from the pens each day. The sand
is absorbent and must be replaced often. Also the pens must be thoroughly cleaned
weekly. As soon as the weather is nice, an indoor, outdoor pen can be used for
the larger chicks.
Hardware Free
Pens must be free of rocks, nuts, bolts, nails, wire, scraps of metal, plastic,
glass, and on and on. If it is smaller than their body, they will try to eat
it. We necropsied a 3 month old that was anorexic and it had 22 nails, nuts
and wire scraps speared through its gizzard as well as bits of glass, plastic
and wood.
Fresh Grass?
Be sure that all rheas are introduced to fresh green grass gradually and at
all times more than adequate grit must be provided. Without this grit, they
can and will impact.
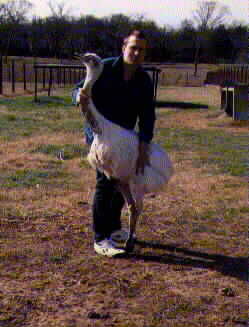
The normal color for a rhea is grey. White
is now becoming more common.
Room to Exercise
To develop strong bodies and legs, the rhea must have room to run and exercise.
Birds that are provided with lots of room have less chance of developing leg
problems and are less apt to eat droppings that are associated with overcrowding.
Temperature/Humidity
Heat lamps should be provided in cool weather and on cool nights. If you have
a large group of chicks in one area, be sure to provide lamps adequately spaced
to prevent piling up of the chicks and smothering. Proper temperature is imperative
to prevent hypothermia. When a chick's temperature drops, it is less resistant
to bacterial, viral and fungal infections. When you suspect a problem with hypothermia,
take the bird's temperature which should be between 102 to 104.5.
Sexing chicks
Chicks can be sexed fairly easily if two persons will work together. Be very
careful with the legs of chicks when handling them as you can damage ligaments
and muscles and could cause leg problems. Always try to work quickly to prevent
stress to the birds. Hold the bird in your arms like a baby, and do not hold
the legs. If you hold the legs the bird will not relax enough to show you what
sex it is and you might hurt the legs. Remember, however, that their toenails
might cause you or your clothing serious damage, so do not put your face close
to them. Massage the area from the vent towards the tummy. If it is a male,
the penis should roll out. It will look like a thin worm. If nothing rolls out,
you may gently open the vent with a Q-Tipr and you should see either the 'worm'
or a small bump that is the clitoris.
Predators
All chicks should be closed in at night to protect them from predators including
dogs and man. Depending on your particular area, you may need to put netting
over the top to prevent flying or climbing predators out.
Sanitation
All areas that are to be used to confine birds should be of such material that
they can be washed and sanitized without getting the birds wet or them coming
in contact with the disinfectant. All foods must be stored where rodents cannot
have access or leave their droppings and urine.
When cleaning or feeding, do young birds first, moving on to older birds as
you go along. This protects the young from diseases and infections that older
birds might be resistant to themselves but carry.
All areas for birds that are in a confined building must have an exhaust fan
to vent ammonia vapors from the building.
Health Considerations
Preventing Impaction
When food or grass becomes firmly lodged in the proventriculus (the true stomach)
it is a serious and lethal problem with rheas and ostrich. When this happens
nothing, even water, will pass through. The only reliable treatment seems to
be surgical removal of the impaction. Rheas are most susceptible between three
and six months. They will eat leaves, rocks, hardware, grass, etc. It is best
to keep these items unavailable to them by properly policing the area in which
they live. Rheas tend to pick up any loose object they can swallow and I have
seen large items in the stomachs of necropsied birds. All these items with the
exception of food should be eliminated. You should not have a problem with food
causing impaction if you provide proper grit.
Monitoring Health
De-worming chicks can be done by several methods. By addition of de-wormer to
the water, by individual oral administration, by topical application to the
back, or by injection.
When worming by certain oral medications, food may have to be withheld for 24
hours. Birds should be weighed and an estimate made for the group to be wormed.
The proper medication should be added to the feed.
Example: Fenbendazol - 7cc per 100 lb. of body weight. Be sure that all chicks
get some of the feed.
Check feces daily to see if it is of an abnormal color or consistency. If it
is, you can take a sample to your vet for analysis. There are many causes of
abnormal stools, including endoparasites, bacterial enteritis, old feed, stagnant
water, etc.
Chicks are susceptible to upper respiratory and central nervous system infections.
Watch for the following symptons: eye or nasal discharge, wheezing or labored
breathing, weakness, lack of co-ordination, convulsions, staggering, bumping
into fence, etc. In the case of any of these symptoms, isolate the animal and
get your veterinarian's advice. He may suggest an antibiotic and support therapy.
Birds may have to be rehydrated subcutaneously or tube-fed.
Check area for wasps, fire ants, rats, mice and other pests that might hurt
your birds or harbor diseases that will harm them.
A Quarantine Area
Be sure to include quarantine areas for new birds and for birds that might be
sick and need isolation and/or special care.
This area should be warm, draft-free and well-ventilated. It should be the last
area tended to if all birds are tended to by the same person. When leaving the
quarantine area, the person and clothing should be disinfected thoroughly.
A Rhea-Aid Kit For You
Disinfectant for instruments, etc.
Latex gloves
Suture material, needles and needle holder
Syringes in sizes from 1cc to 60 cc
Catheters in sizes 12 to 16 French
Genocin Eye Antibiotic
Betadiner
Furazoner Spray
Electrolytes
Water Soluble Vitamins
Mineral Oil
Stat-VME high calorie supplement
Gentocin injectable
Vet Wrap and adhesive tape
Gauze
Cotton Swabs
Phone number of your veterinarian - home-office
Phone number of the rhea breeder willing to
do consultation
Check List for First 6 months
Day One
Band or Micro-chip
Record hatch
Treat navel with Betadiner
Check legs and hobble if necessary
Check for any abnormalities
Leave in hatcher, with good traction on floor
of tray
Day Two
Re-treat navel with Betadiner
Move to first brooder.
Check water dishes, temperature (85-90 degrees),
etc.
Include electrolytes in water
Sprinkle some food on white towel, chopped
greens in water.
Day Four
Re-check navel
Remove hobbles, check to see if chick is walking
normally, if not reapply.
Move to another brooder with temperature of
80-85 degrees
Include electrolytes in water
Provide some grit on towel
Day 14
Move to run that has access to outside on nice
days, heat as necessary
Begin feeding two to three times a day, gradually
changing to twice.
Provide grit
Include electrolytes in water
Add pellets to crumbles
Sex Birds
30 - 45 Days
Move to larger run with access to inside. Provide
heat as necessary
Check fecal sample for worms or de-worm entire
group
Add vitamins and electrolytes to water 2-3
times a week
3 Months
Add vitamins to water once or twice a week
Re-sex birds
Move to larger run.
Cull as necessary for deformities
Your Veterinarian
Your veterinarian will be your very best ally in keeping your flock healthy
and disease free. Pick a veterinarian with expertise in exotics and/poultry
and one who has a rapport with the local veterinarian universities. Interview
your vet to see if he/she is willing to call for consultation or do research
when you have perplexing problem. See if the veterinarian will show you how
to do injections and fecal flotations for parasites. Be sure you have a veterinarian
who has another experienced veterinarian who can fill in when your vet is not
available. Of course, animals never get sick from 9:00 to 5:00 on weekdays.
Left: Rhea egg - 660 grams; Middle: Cassowary
egg - 560 grams; Right: Emu egg (from pullet) - 575 grams
R-Zu-2-U Home
R-Zu-2-U FAQs
R-Zu-2-U Animal "Terms"
Treasure Ranch Home